
Scroll through TikTok or Instagram for five minutes and you’ll find someone fixing a leaking shower with a grout pen, a tube of silicone and a satisfying time-lapse. The comments are full of people saying they’re about to try it this weekend. Here’s the problem. Most of those videos treat the symptom you can see. Real leaking shower repair starts underneath the tiles, where the waterproofing membrane either did its job or didn’t.
We tile and waterproof bathrooms across Brisbane, Logan, the Gold Coast and the Sunshine Coast every week. A lot of that work is fixing showers that were “fixed” before. This guide explains what’s actually going on when your shower leaks and when a regrout is enough. It also covers when the job needs to come up, and why Queensland treats waterproofing as licensed work.
Key takeaways
- Most shower leaks come from a failed or missing waterproofing membrane, not the grout itself. Grout is not waterproof.
- A shower regrout can help when the membrane underneath is sound and the problem is cracked or missing grout and silicone.
- Water stains outside the shower, drummy tiles, mould on skirting or a swollen door frame usually mean the membrane has failed.
- In Queensland, waterproofing work generally needs a QBCC-licensed waterproofer and must meet AS 3740.
Why is my shower leaking through the tiles?
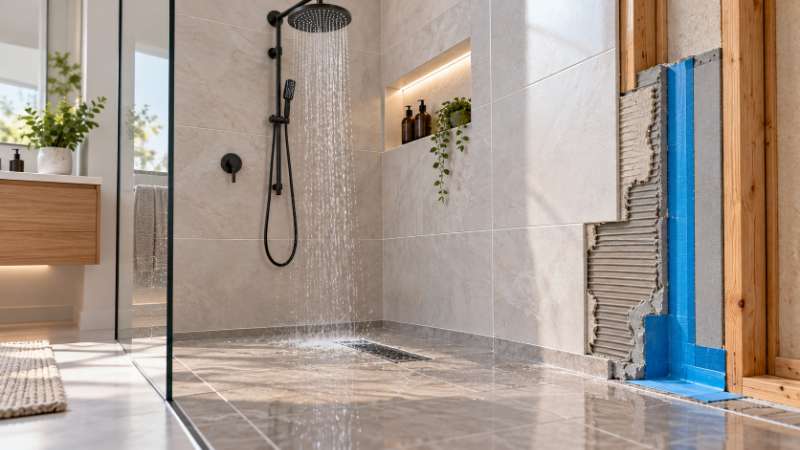
A shower leaking through tiles usually means water is getting past the grout and the membrane underneath has failed, cracked or was never installed properly. Tiles and grout are the finish layer. The membrane is what keeps water out of your walls, floor and the room below.
Grout is porous by nature. Even good cementitious grout lets moisture through over time. That’s expected, because the system relies on the membrane sitting under the tile bed to catch that water and direct it to the waste.
When that membrane fails, the water goes somewhere else. Common failure points we find include:
- The wall to floor junction, where movement cracks the membrane if no bond breaker or flashing tape was used
- The puddle flange around the floor waste, where the membrane wasn’t lapped into it correctly
- Poor fall to waste, so water sits in the shower and soaks through instead of draining
- The water stop angle at the shower entry, which is sometimes missing in older bathrooms
- Tap and mixer penetrations that were never sealed
In South East Queensland, humidity makes this worse. Bathrooms stay damp for longer, which gives mould and timber rot a head start once water gets behind the tiles.
Shower regrout vs full repair. Which one do you need?
A shower regrout is worth doing when the membrane is intact and the only problem is worn grout or silicone. If water is already showing up outside the shower, a regrout won’t fix it.
This is where the viral videos fall down. Covering cracked grout with a grout pen or running fresh silicone over an old joint can make a shower look new. It does nothing for a membrane that has split underneath.
Signs a regrout may be enough:
- Grout is discoloured, cracked or missing in spots, but tiles are firm
- No staining, swelling or mould outside the shower area
- No hollow sound when you tap the floor tiles
Signs you need a proper leaking shower repair:
- Drummy (hollow sounding) or loose tiles
- Water stains on the ceiling below or the wall next door
- Mould along skirting boards or a swollen door frame or vanity base
- White powdery efflorescence on grout lines
- A musty smell that comes back no matter how much you clean
A moisture meter reading and a visual inspection will usually tell a tradesperson which camp you’re in. That’s the first thing we do on a quote.
Why DIY shower waterproofing fails
DIY shower waterproofing fails because the membrane is only one part of a system that also depends on prep, falls, junction detailing and correct cure times. Paint-on membranes from the hardware store look simple, but the steps around them are where things go wrong.
The DIY shortcuts we see most often:
- Skipping substrate prep. Membrane over dust, old adhesive or an uneven surface won’t bond properly.
- No bond breaker or flashing tape at junctions. These allow for movement where walls meet floors. Without them, the membrane cracks as the house moves through Queensland’s heat and storm cycles.
- Wrong falls. If the screed doesn’t fall to the waste, water ponds. Ponding water will find any weak point.
- Rushing cure times. Every membrane has a manufacturer cure time before tiling. Tiling too early traps moisture and weakens the bond.
- Tiling over old tiles. Peel-and-stick tiles or tiling straight over existing tiles in a wet area hides problems instead of solving them.
There’s also the legal side. In Queensland, waterproofing is regulated work, and unlicensed waterproofing can affect your insurance and your home warranty position. It can also cause trouble when you sell.
How to waterproof a shower properly
To waterproof a shower properly, a licensed waterproofer prepares the substrate, sets correct falls, details every junction and penetration, and applies a compliant membrane to AS 3740. The tiler then installs tiles to AS 3958.1 once the membrane has cured.
Here’s the step breakdown we follow on a full shower rebuild.
Strip and inspect
- Remove tiles, bedding and any failed membrane.
- Check the substrate for water damage, rot or movement. Fibre cement sheet, villaboard or slab all get assessed.
- Bring in a builder or plumber if framing or the waste position needs work.
Prep and falls
- Clean, repair and prime the substrate.
- Lay a screed with consistent fall to the waste so water drains and doesn’t pond.
- Install or check the puddle flange and water stop angle at the shower entry.
Membrane and testing
- Fit bond breaker and reinforcing flashing tape at all wall to floor and wall to wall junctions.
- Apply the membrane at the correct thickness and coverage, including turn-ups and penetrations.
- Let it cure fully to the manufacturer’s spec.
- Run a flood test where appropriate to confirm it holds water before any tile goes down.
Tiling and finishing
- Tile using an adhesive suited to wet areas, with full coverage to avoid hollow spots.
- Grout with a suitable cementitious or epoxy grout. Epoxy grout resists staining and water absorption well in busy family showers.
- Finish all movement joints and changes of plane with flexible silicone, not grout.
Because we’re both tilers and licensed waterproofers, this happens under one team. That removes the gap where a waterproofer blames the tiler, or the tiler blames the membrane. You can read more about how we handle bathroom tiling in Brisbane and our licensed waterproofing services in Brisbane.
It’s not just showers
The same principles apply outside. Balconies and patios in SEQ cope with heavy summer storms and serious heat expansion. A failed external membrane often shows up as leaks into the room below or tiles lifting. If that sounds familiar, our outdoor tiling team deals with balcony and patio waterproofing too.
For body corporates and property managers, leaking showers in units can turn into neighbour disputes fast. We handle multi-unit and commercial tiling and waterproofing with the scheduling and documentation those jobs need.
Leaking shower repair FAQs
How much does leaking shower repair cost in Brisbane?
It depends on the cause. A regrout and reseal costs far less than stripping the shower and replacing the membrane. Price also moves with shower size, tile choice, access and whether there’s water damage to framing or the floor below. The only honest number comes from an inspection, which is why we offer obligation-free quotes.
Do I need a licensed waterproofer in Queensland?
Waterproofing in Queensland is regulated by the QBCC, and licensing requirements apply to waterproofing work. Using a licensed waterproofer means the work is done to AS 3740 and gives you proper recourse if something goes wrong. Avid Tiling holds QBCC licence 15094350.
Can I fix a leaking shower without removing the tiles?
Sometimes. If the membrane is sound and the issue is grout or silicone, a regrout and reseal can work. If the membrane has failed, sealants and grout coatings will only buy time, and the leak will come back.
How long does a shower rebuild take?
Most full shower rebuilds take several days. Membrane cure time is the main factor you can’t rush. Older bathrooms with hidden water damage can take longer once we see what’s under the tiles.
Worried about a leaking shower? Call Avid Tiling on 0458 779 881 or request a free quote. We’ll tell you straight whether it’s a regrout or a rebuild.